Instagram Graph API v10.0 を使ってインスタの投稿を埋め込む方法

どうもこんにちは塚本です。
2020年3月2日にInstagram APIがInstagram Graph APIに変わり
投稿をWeb上で読み込む方法が変わったかとおもいます。
それに伴って、
「Instagram Graph API v6.0 を使ってインスタの投稿を埋め込む方法」
というブログを書いていたんですが、もう今はバージョンが10になっているようです。
GUIも少し変わっているようなので、登録手順の更新と
アクセストークン3とInstagram Business AccountのIDの自動取得ツールをつくってみました。
お急ぎの方へ、
自動取得ツールはこちらです → Instagram Graph API Acquisition tool
※ APIのバージョンがv13.0になっていたので、最新の記事を書き直しました。
大まかな手順
1. インスタグラムをプロアカウントに切り替える
2. Facebookページとインスタグラムをリンク
3. Facebook for Developers にアクセス
4. アクセストークン1, app secret, アプリIDを取得
5. 取得したデータをツールに入力
6. 自動取得されたアクセストークン3とInstagram Business AccountのIDをコピー
7. サイトへ埋め込み
なお、1〜3は解説の必要がないと思うので省きます。
各必要情報の取得
マイアプリへアクセス
Facebook for Developers にアクセス後、右上のマイアプリをクリックしてください。
※ はじめての方は新規作成?みたいなボタンになると思います。

マイアプリを作成
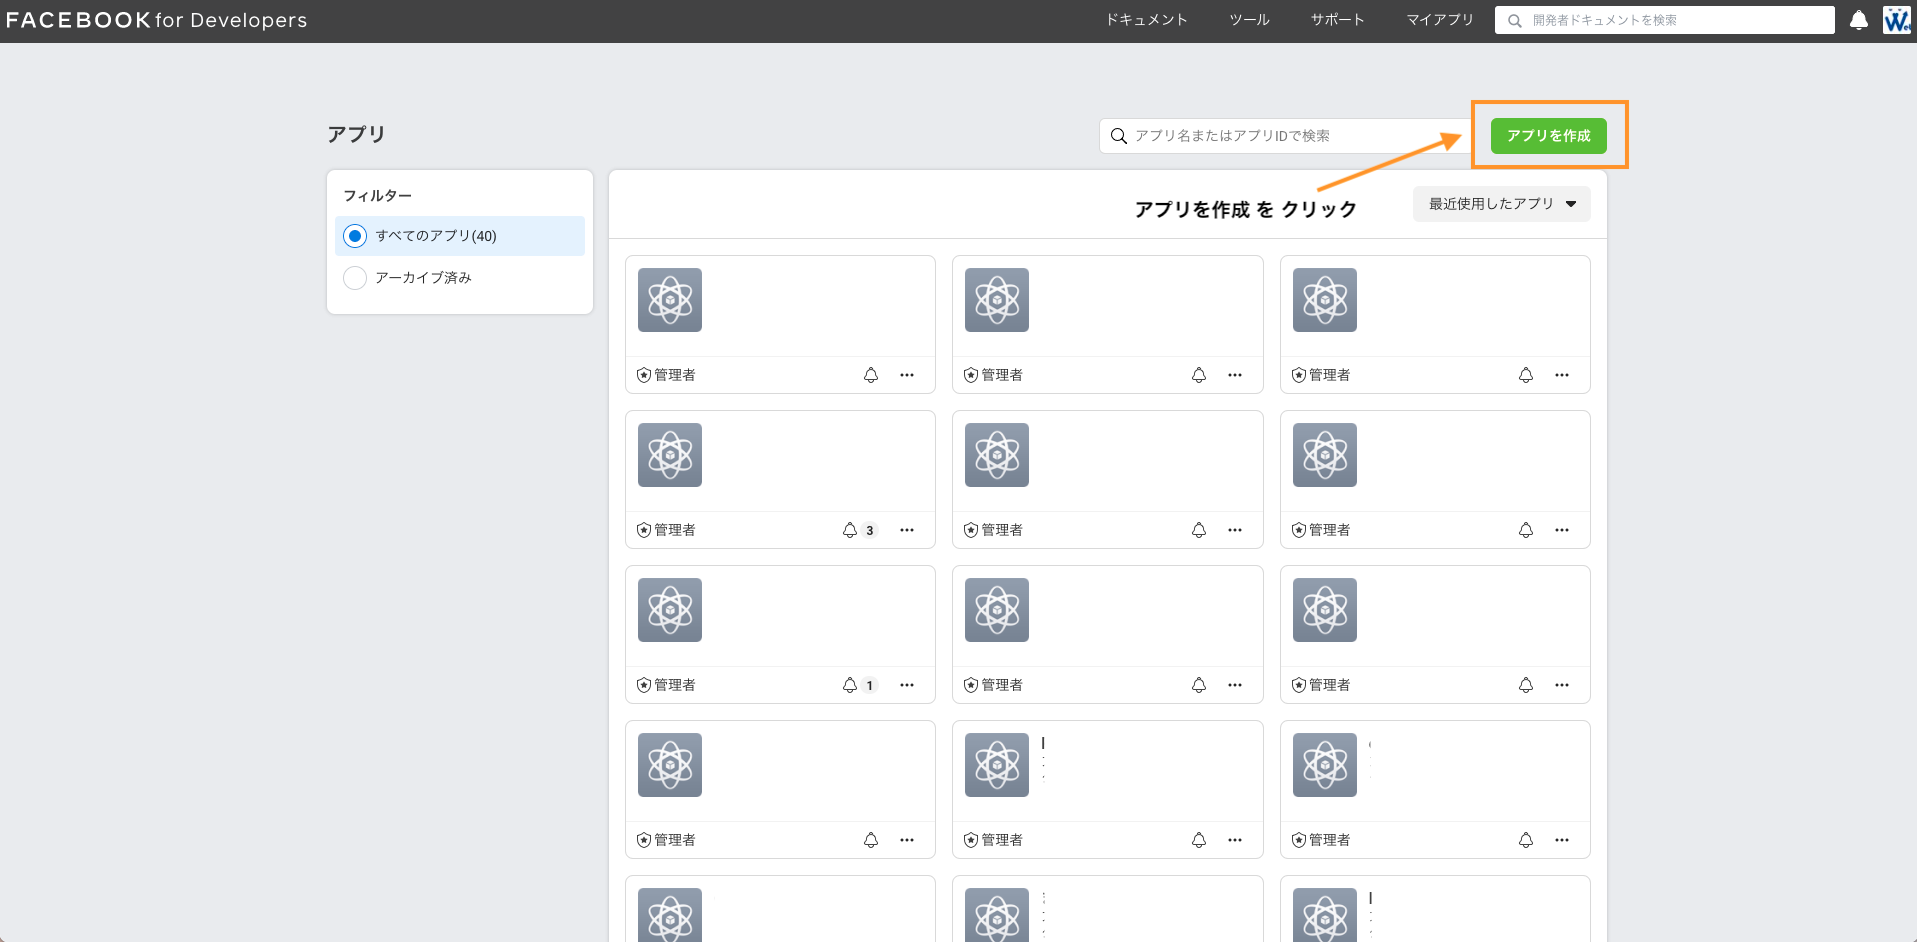
マイアプリ画面に来たら、右上の緑のボタン
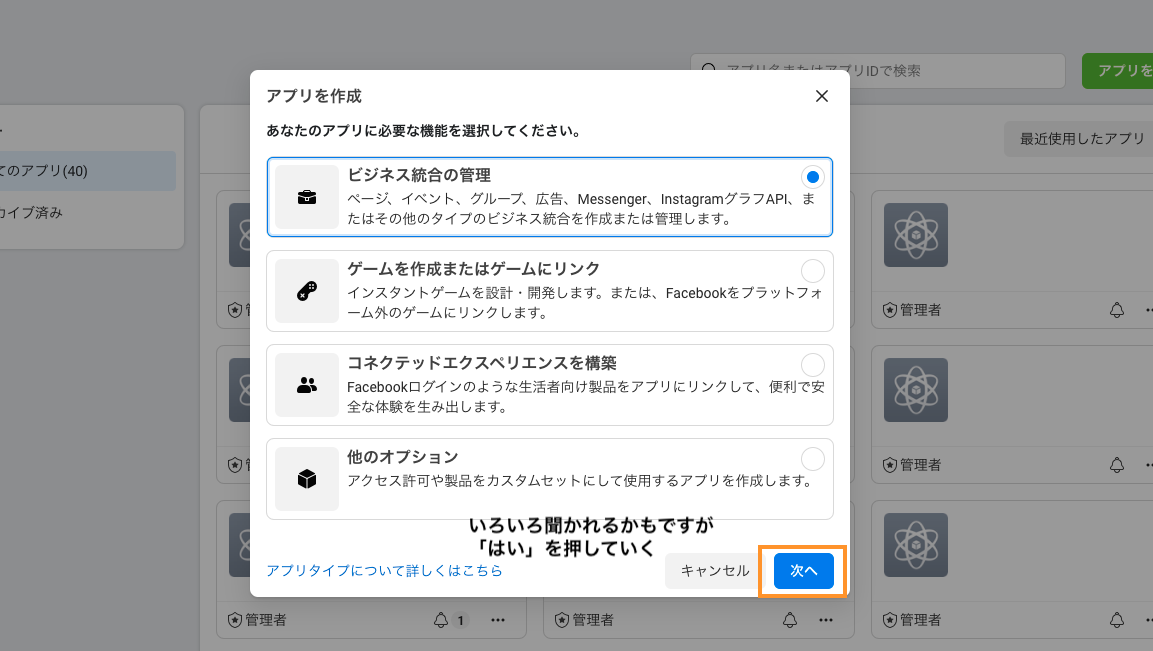
アプリを作成を押してアプリをつくりましょう
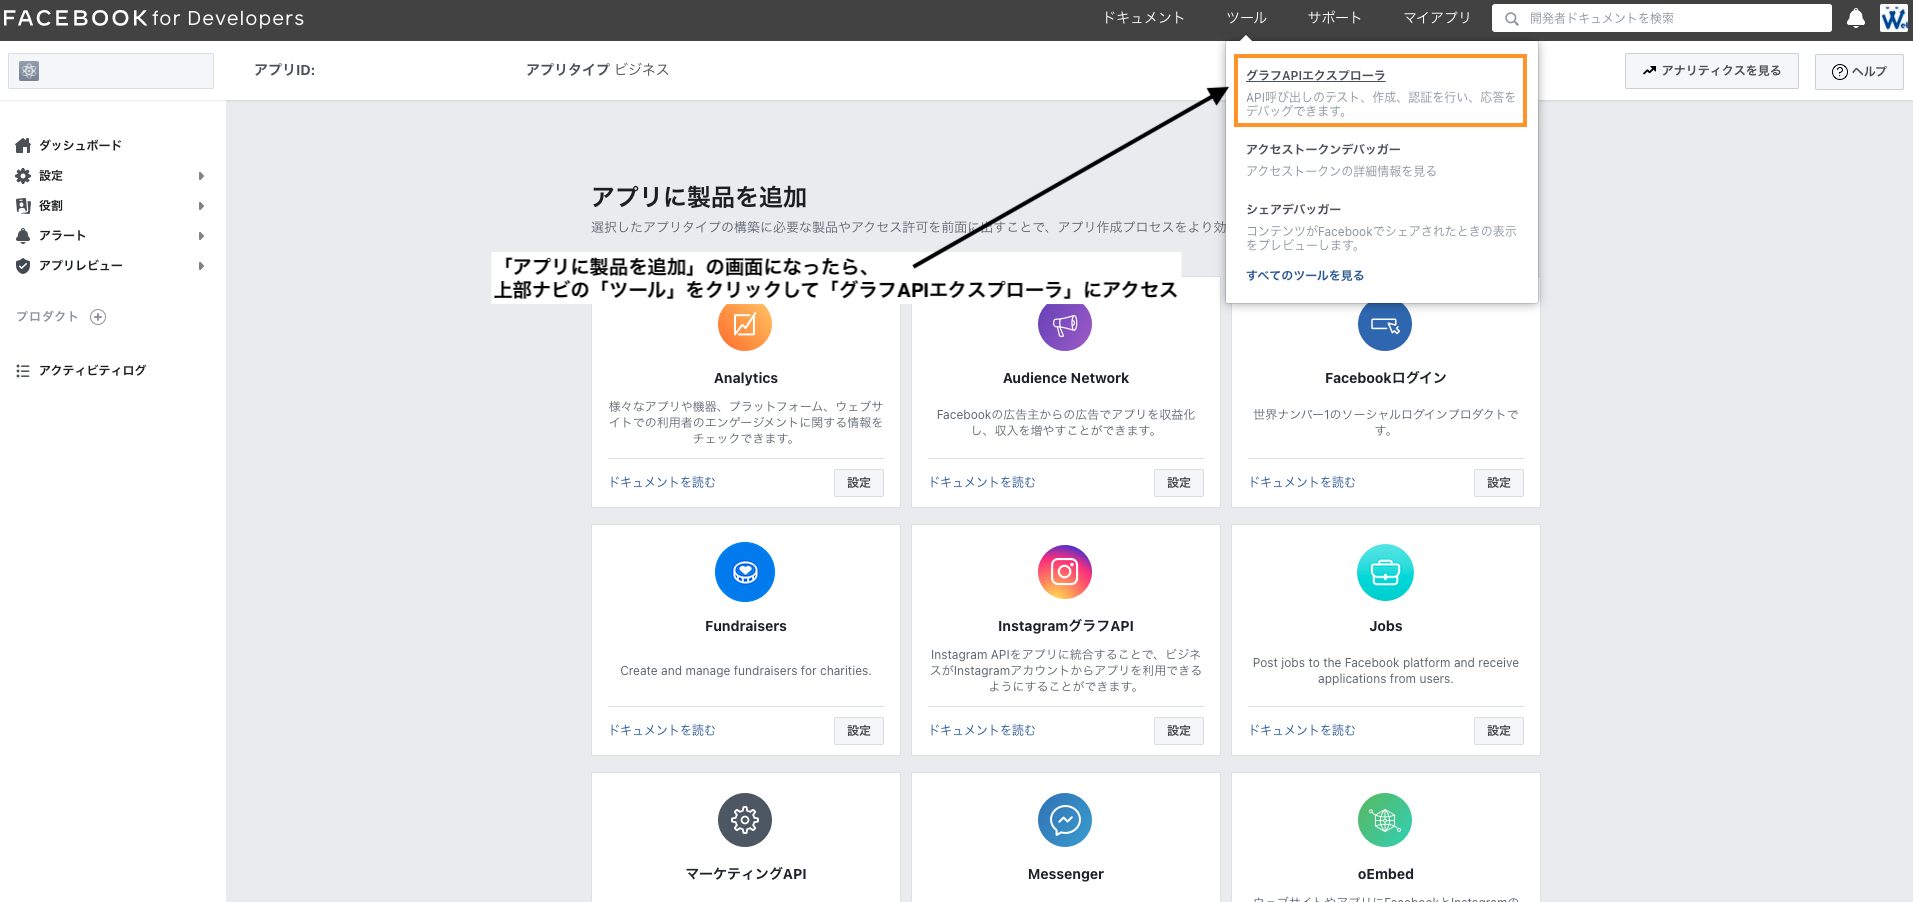
グラフAPIエクスプローラにアクセス
アプリができたら、エクスプローラにアクセスします。
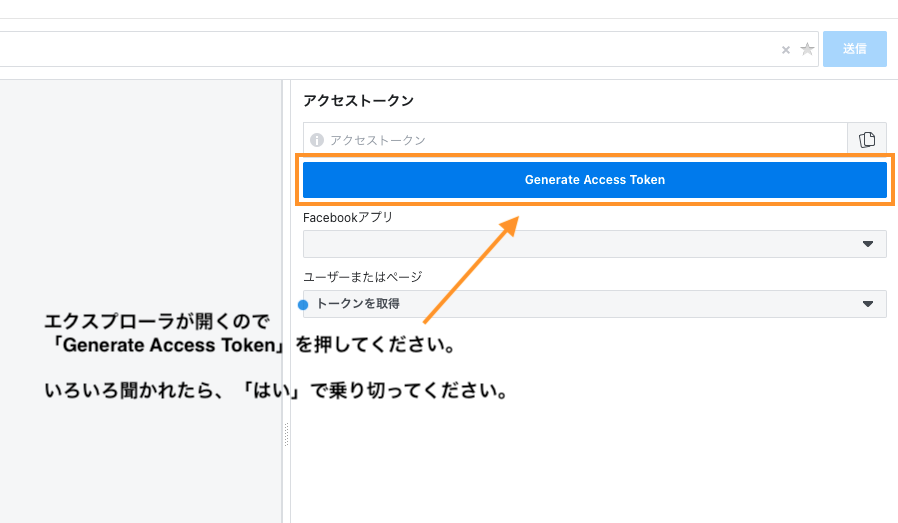
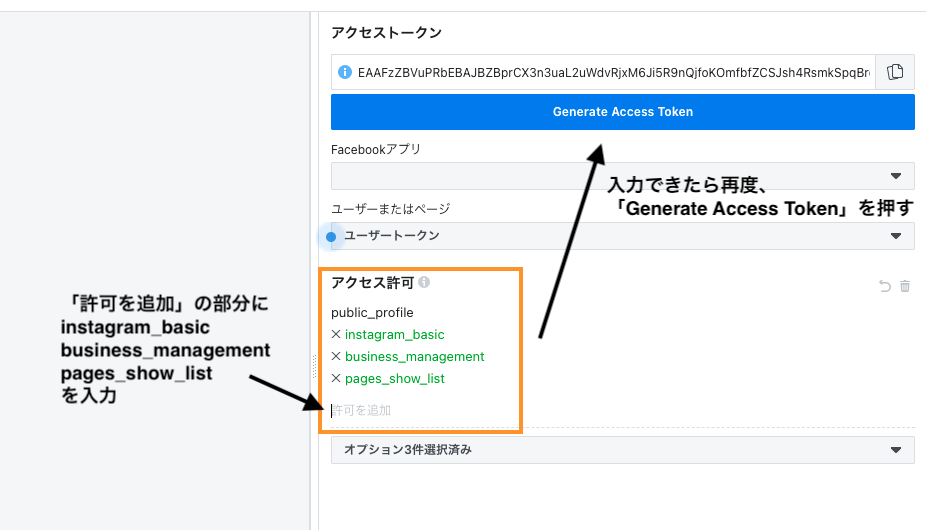
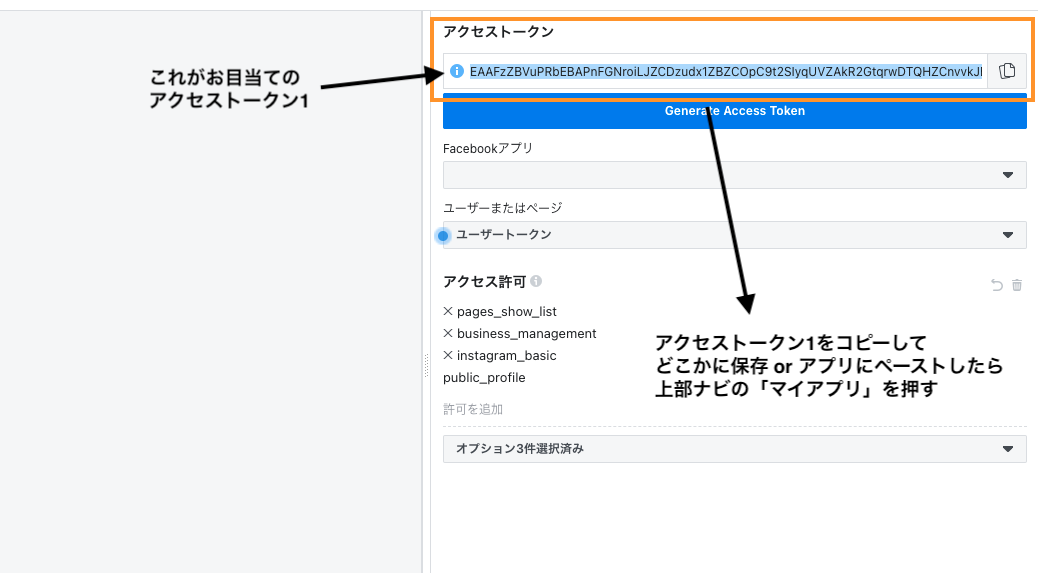
ここでお目当ての「アクセストークン1」が取得できました。
マイアプリ画面に戻る
上部ナビバーのマイアプリをクリックして、
アプリ一覧画面に戻って下さい。
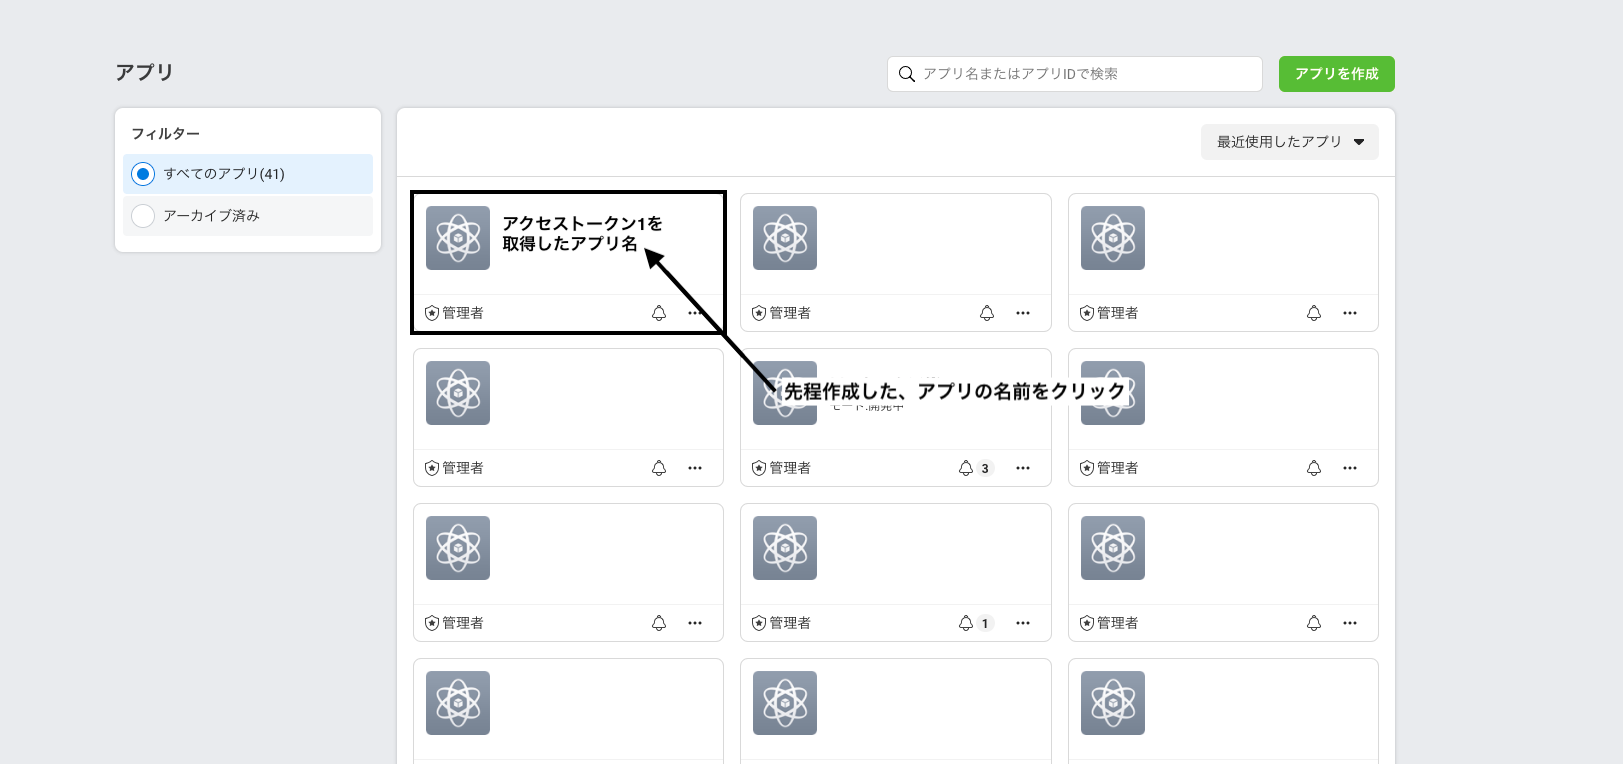
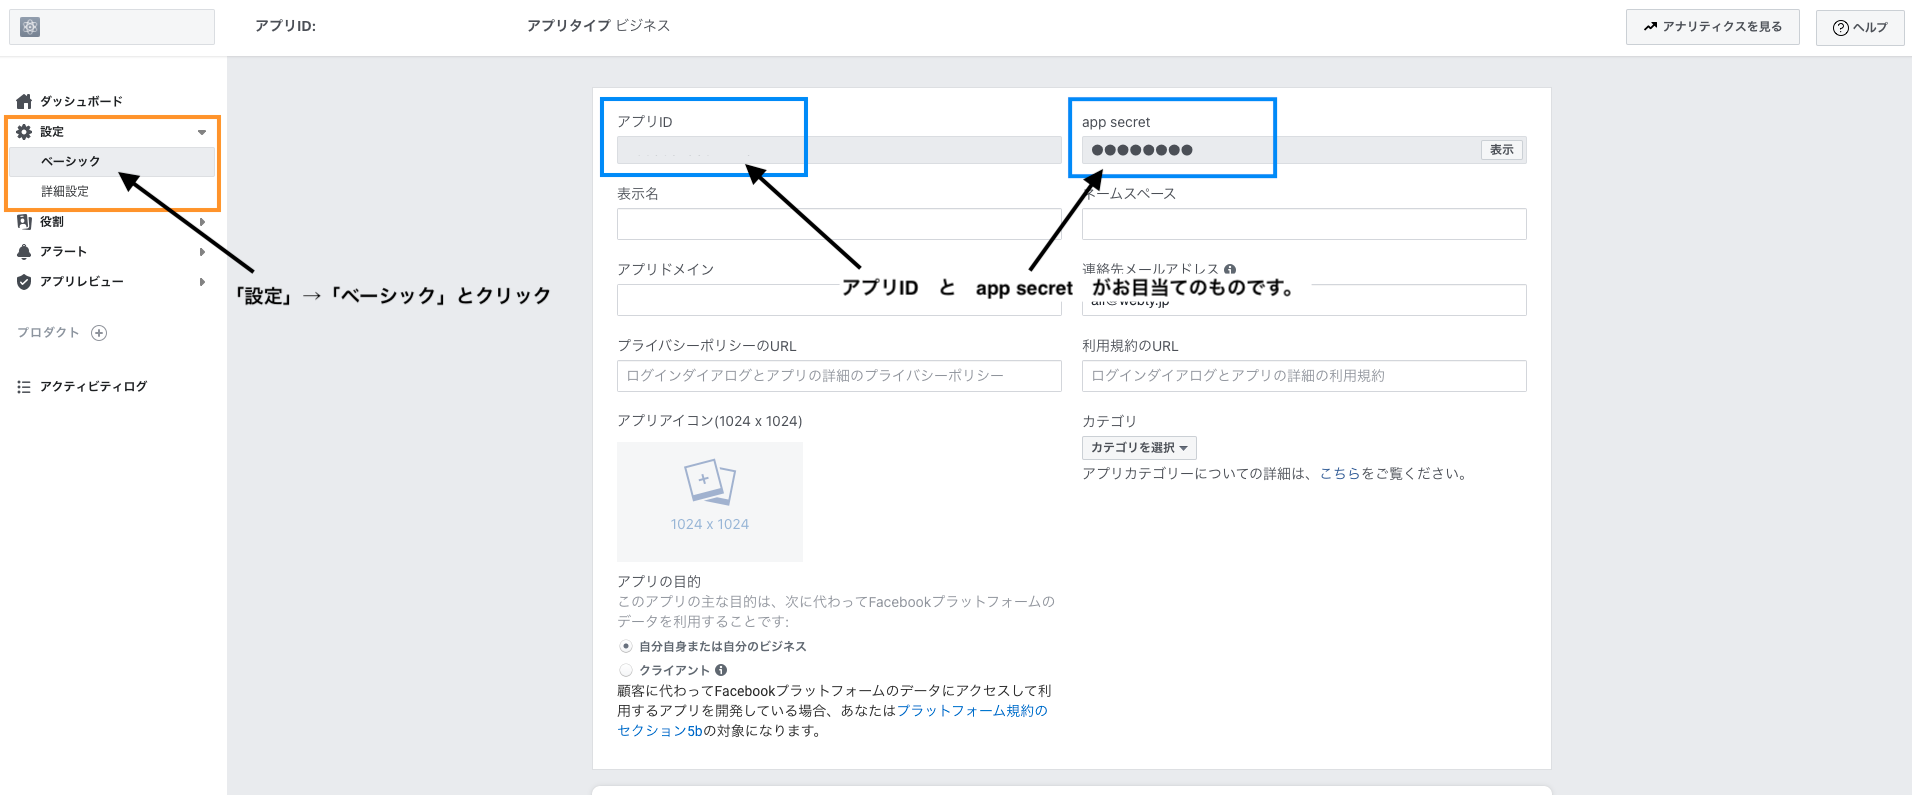
作成したアプリページにアクセス
設定→ベーシックとクリックしていくと、
こちらもお目当てであった、アプリIDとapp secretが取得できます。
ツールをもちいてアクセストークン3を取得する
先程までの手順で、以下のデータが取得できたことを確認します。
- アクセストークン1
- アプリID
- app secret
ツールにアクセス
Instagram Graph API Acquisition toolにアクセスしてください。

ツールの各フォームに必要情報を入力していってください。
Facebook Page NameはインスタとリンクしたFacebookのページ名になります。
アクセストークン3とInstagram Business Account IDの取得
Go!ボタンを押すと、ポップアップでこんな感じの画面が出現します。
アクセストークン3とInstagram Business Account IDが自動取得されます。
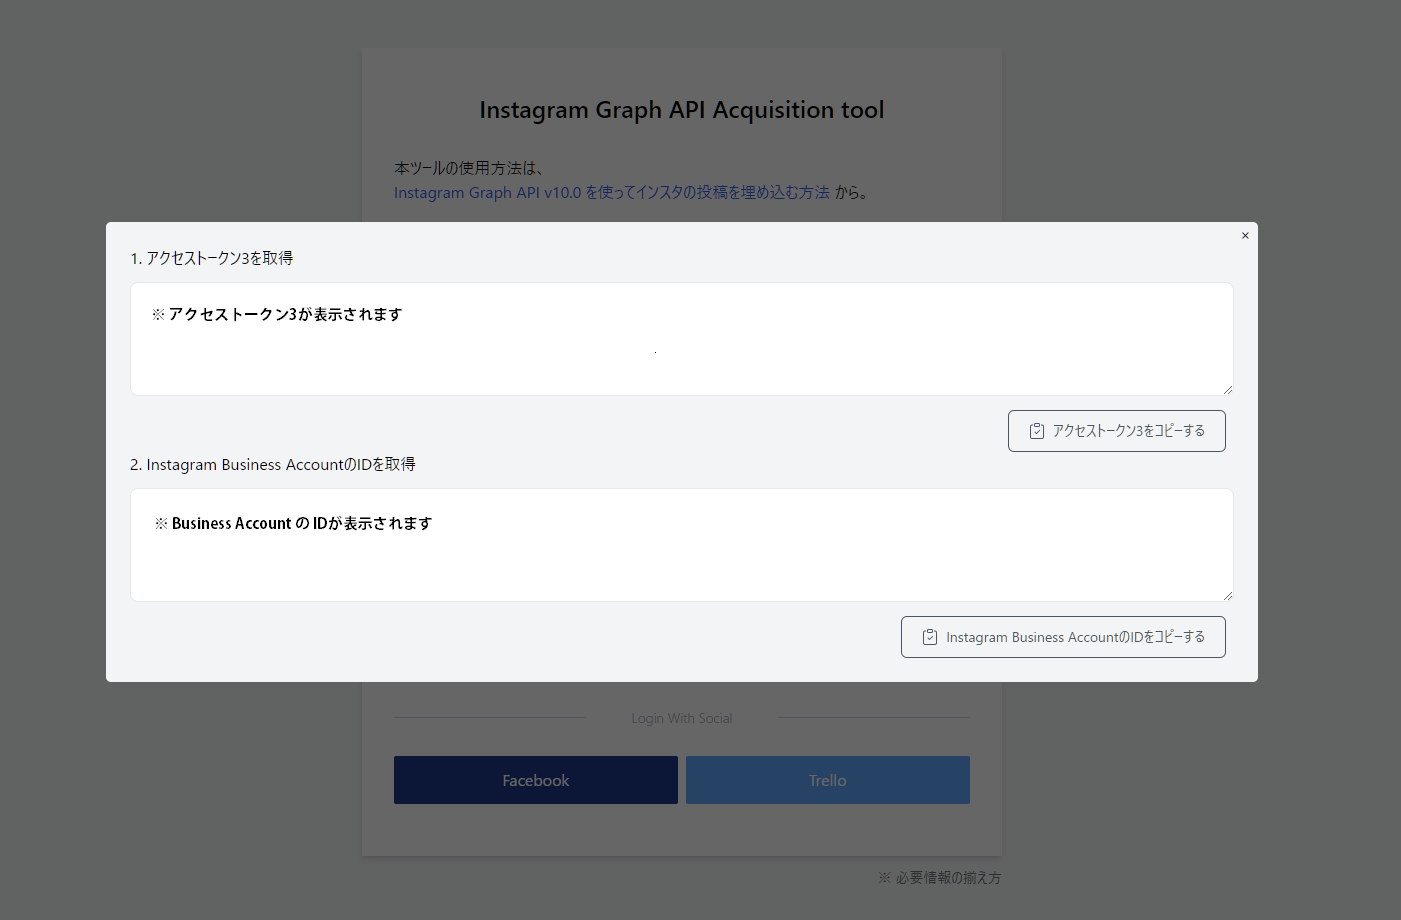
アクセストークン3とInstagram Business AccountのIDを実際に使用するので控えておいてください。
ホームページへ実際に埋め込んでみる
無事にアクセストークン3とidがとれたら、埋め込み可能です。
超適当ですがソースを置いておきます。
投稿の取得
<?php

class Instagram
{
    protected string $version;
    protected int $instagram_business_account;
    protected string $instagram_access_token;
    protected string $base_uri;
    protected array $posts = [];

    public function __construct(int $instagram_business_account, string $instagram_access_token)
    {
        $this->version              = 'v13.0';
        $this->instagram_business_account = $instagram_business_account;
        $this->instagram_access_token     = $instagram_access_token;
        $this->base_uri = 'https://graph.facebook.com/' . $this->version . '/' . $this->instagram_business_account;
    }

    public function getPost(int $media_limit)
    {
        // 今は省いてるけどエラー処理をはさんでね
        $raw_json = @file_get_contents($this->get_uri_for_getting_posts($media_limit));
        $json = mb_convert_encoding($raw_json, 'UTF8', 'ASCII,JIS,UTF-8,EUC-JP,SJIS-WIN');
        $obj = json_decode($json, true);

        if (isset($obj['media']['data'])) {
            foreach ($obj['media']['data'] as $v) {
                $this->posts[] = [
                    'img'     => $v['thumbnail_url'] ?? $v['media_url'],
                    'caption' => $v['caption'] ?? '',
                    'link'    => $v['permalink'] ?? '',
                ];
            }
        }

        return $this->posts;
    }

    private function get_uri_for_getting_posts(int $media_limit)
    {
        $query = [
            'fields' => "name,media.limit({$media_limit}){caption,media_url,thumbnail_url,permalink,username}",
            'access_token' => $this->instagram_access_token,
        ];

        return $this->base_uri . '?' . http_build_query($query);
    }
}
表示部分
// ビジネスアカウントのID, アクセストークンをいれてね
<?php if( $instaPosts = (new Instagram(BUSINESS_ACCOUNT_ID, ACCESS_TOKEN))->getPost(10) ): ?>
    <ul>
        <?php foreach ( $instaPosts as $post ): ?>
            <li>
                <a href="<?php echo $post['link']; ?>" style="background:url('<?php echo $post['img']; ?>') 50% 50% / cover no-repeat;" target="_blank"></a>
            </li>
        <?php endforeach; ?>
    </ul>
<?php endif; ?>
まとめ
v10になったので、さすがに記事が古いと思い
ツールと一緒に作り直してみましたが、なかなか初心者の方には難しいのではないかと思います。
でも今はプラグインとかがあるので
そちらでサクッとやっちゃうんですかね?
最後のphpのコードは参考程度にお願いしますm(_ _)m